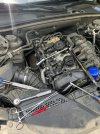
What have you done to your car today?

small victory on the wifes minivan. After spending $400 having the power sliding door fixed I was looking forward to the other side to fail. Powered by youtube I had it fixed in 45 minutes. I didn't get a pic of the door falling off the jack but that did happen. Fun stuff!

qQCygOLrxi4GVPZSldHtRWgo09NEHrY8M_jqSDly5yH-BPlnDeWfdSq0RAHP5GM_sXIhi_BBALPs5hVDL19tcoBLCbVgDIBzQnqjqMCPiFUcCoEiT_29_Kc8sWCa2f0TNCBLhIciy7I71sCZToyVKs7y1NOuqvKd7KiKjBnoMQ_6PJb-fZ9Y3EBnZJXvh7rDj2Of-qi-A1kiM1VQQ3Sbo67HjPo4SiOAvlyozLbqtrBRtnXxohHAENmwzP6deW4YjbFfvTXtgArphz7_9cddlbuypT_Vbokm76cu8JPGf2CMw5XEbxxUnX87wcnLqC2Rzq-J6rkhbwKzXuCLxokUfE6X6SNzEMqX1Z1A94wBAb22v5Uu-ezGxQOfJX8eFq96en66YeBks0sxcnbplbQrqmpPxJNwQQwwsWweeN82vy0dT1N3pQd1q5LWSCAo9kVWmmSorGCmff1bis6xdgN_Mgo3CkLJonHiPEpb98PeeVVvDme7aOB_KoQSpXsAoyI7G5UiySVUsfeNZnpxJPGLLafxy9pttwonPDsm8E_4uakvJa0MZFm1nrdZd6VHItkhMSlGCJtoC-lNNHwIA8n8FH8bU_j6gNgPhszeP2LMHp2mUhwmmC5DWAOuZHVFohq480mYKbvHK-JjxXCcx4LlG3PQPXjl9TWHJxRlO-q9QEws-pcMagk66MU9kn0zH7ASYoyjpr5xfUWTNKKuebgOjF87SMtw11Qar9DWetHTNqCjvJgzQ7oueFsRnSqCLITYr3HHpzE4R0ry9C3w6LNxr1G2p7vaP9WxRaW-OZPANvlWCdK0Iejjy-hIupJKKSBQ_1RlOXS3MsTrMZy8fLjFjU7X7HJWunNr_t63AmBG-kpCxPCYuNiDwk5ME6QR33JpA4zLL8w24J7YlWjPke7v_yN0mn9RQNioQ5wAHNBHRti7D3fdPQ=w515-h916-s-no


_R5D1P1EU6XI65tBAGYXVvEv8vURakwHa4zh4dOwvcCkX883QOSej3ME70flXkoQQ4KEIgrAvrpsZOlhBiSaAT6Ae26sMB-KutEadIKHzVAfSLpSALTQmcDZWmfbKlTDkoWZH-bd8_wXj9gfl1DoN9psHzWV_UmjkmZOfBrhyhNMTN0UQ9izQVJNw4TJ8FtdFuY1LjXYpcV9QdB4Ielpz7m1sP6PkbHo0tBcqP8_7Pni-rgiy0OUWtyv7gGsXFuDdMOA9Z8gWL4DmqOHdOzEp89lAwS2J0beg0F-_yV6fQ6dEMfB7aHRJxj8CrDzFaeSwr7bTqwOfgaBplrY1MdXDJaUJiCf8Ks3sYOKrEzx062_j7hm9tKJCOhpLd_mcKB_5hd5MJCsE6LcGAK7fq2PwPWrgtNI36HZYAZdGulA2yAv97uq_vPSJ4m02NB8q96-yVEI6AlizquAxYrx5m9BchlryxemD07ySZXacoo6LufTnK_Gshv8xrlvfaagnk7ki0yQivvzlA1tpORlkFzSU2d1lxqtlRd5vZ_BEQ4_kZblGumbVZ1GY5Vb2HqSq4kbElG0keMWcDqgycOwYnCR0wvxvYh5SBqwRib4hxmDVWlniwjpKH02Chz32fciyLlKSXiOCMEAp7IGHdFWPg9u8Ai2fifH3FdNt8sClAib8c9SyLQbdT0Cd_CljELzVekWtaOtNW0xdh-GxtjU0xVFLIuM1tmpCp01kitzX6auoh4NxkgMJ2qrUW5hZlkONWGbq3XHOthdvEzi3mGExeb-YY1evLUT13R8Jjzy9En7pyHKZNAAhERMb_lqPkkbkFpxVM0ohRQrb0yLvp8tmNFPmQCs5i4CBTT7KqMZDStTIIQTViI5gTGEMArr-SZsYHloVHidQOrYYINmFhMPmVtFY9Mln_yjmWAi7L2xonTG1OLGLXlD0g=w515-h916-s-no
 
Last edited:
It was going to be so easy - a burnt-out directional bulb.
Ordered it on the rain forest, came next day.
Watch a 'tube vid, cause someone must have done this - yeah, most of the people are removing the front end,
some are just removing the headlight assemble, and one person actually recognized what is supposed to be done.

First there is a cover with 14 of those push style plastic rivets. Got the tool, so not horrible.

1690997289466.png

all good

1690997387271.png

There it is! Too small for any hand

1690997432240.png

hmm - but that is a 14 mm hex head - so a ratcheting box wrench will do the job (or a regular socket) - combine that with a long set of needle nose.
I have both replaced in under 5 minutes. May as well test them before buttoning it up.
Same side is out - WTF. So I swap sides and it follows the bulb.

I decide to bench test it.

1690997650272.png

Upon closer inspection, there was some arcing at the connection.

1690997616392.png

So I bend the tab up a bit, and clean it with a file. Bingo.

1690997713656.png

What could have taken sub-15 minutes took 40. Still not bad for a car project.
 
Last edited:
It was going to be so easy - a burnt-out directional bulb.
Ordered it on the rain forest, came next day.
Watch a 'tube vid, cause someone must have done this - yeah, most of the people are removing the front end,
some are just removing the headlight assemble, and one person actually recognized what is supposed to be done.

First there is a cover with 14 of those push style plastic rivets. Got the tool, so not horrible.

View attachment 220107

all good

View attachment 220108

There it is! Too small for any hand

View attachment 220109

hmm - but that is a 14 mm hex head - so a ratcheting box wrench will do the job (or a regular socket) - combine that with a long set of needle nose.
I have both replaced in under 5 minutes. May as well test them before buttoning it up.
Same side is out - WTF. So I swap sides and it follows the bulb.

I decide to bench test it.

View attachment 220111

Upon closer inspection, there was some arcing at the connection.

View attachment 220110

So I bend the tab up a bit, and clean it with a file. Bingo.

View attachment 220112

What could have taken sub-15 minutes took 40. Still not bad for a car project.
you did save about $200 in labor for the repair shop to do it tho.
 
I just spent about 1 Kona Honzo ST frame to get a simple tune up done on the cherockee...don't get me started on what it takes to change a headlight bulb on that one either. Ridiculous!
What is the frequency of a tune up for cars today, 100K miles?
My 68 Chevy II was about 30k miles for points, plugs, condenser, cap, rotor, air filter, maybe wires.
 
What is the frequency of a tune up for cars today, 100K miles?
My 68 Chevy II was about 30k miles for points, plugs, condenser, cap, rotor, air filter, maybe wires.
About right, mine is at 120K now, to be honest they also performed a compression test and changed 3 coils. They’ve always been very reasonable so far and very accommodating with various emergencies I needed their help with, mine is more of a complain about the design of that specific engine requiring so many hours to do an otherwise menial job…
 
About right, mine is at 120K now, to be honest they also performed a compression test and changed 3 coils. They’ve always been very reasonable so far and very accommodating with various emergencies I needed their help with, mine is more of a complain about the design of that specific engine requiring so many hours to do an otherwise menial job…
When looking under the hood of modern cars, there is so much plumbing and plastic that to remove all that and get to a COP and plug could take some time. COP=Coil On Plug. On my F150, when a COP failed I would replace all rather than wait for the others to go. Might seem wasteful but better than having one drop out and the truck limping off the road.
 
its mostly a packaging issue with the FWD cars, all (3) of the rwd cars i have done it on in the last 5 years the COP was accessible from the top of the engine by just removing the plastic cover.
 
its mostly a packaging issue with the FWD cars, all (3) of the rwd cars i have done it on in the last 5 years the COP was accessible from the top of the engine by just removing the plastic cover.
What brand vehicles were the RWD? Any German brands?
 
you would think a transverse mounted 4cyl would put all the goodies right in your face.
V6, 50% ? otherwise you need to remove the turbo to change the COP/plug.
 
you would think a transverse mounted 4cyl would put all the goodies right in your face.
V6, 50% ? otherwise you need to remove the turbo to change the COP/plug.
Yes, 4 banger are mostly in plain sight (my Eclipse did not have coil-on-plugs standard, but was one of the many standard mods available). My 2015 Jeep GC 3.6 V6 apparently has 1 bank exposed and the other one (the one that had the problem in my case, obviously) requiring to remove the intake. They replaced the coils on the offending bank not to have and go back re-doing the job in case a coil fails, only the sparkplugs in the accessible side. I would have replace all 6 coils but apparently they're $$$...
2015wk2splug.JPG
 
Last edited:
Yes, 4 banger are mostly in plain sight (my Eclipse did not have coil-on-plugs standard, but was one of the many standard mods available). My 2015 Jeep GC 3.6 V6 apparently has 1 bank exposed and the other one (the one that had the problem in my case, obviously) requiring to remove the intake. They replaced the coils on the offending bank not to have and go back re-doing the job in case a coil fails, only the sparkplugs in the accessible side. I would have replace all 6 coils but apparently they're $$$...
View attachment 220187
The good old days, F150 300 CI 6 (not mine):

The Tremendous Impact of the Ford 300 Inline 6
 
Funny y’all are talking about coils. I went to change plugs last week and the rubber insulator from a coil stuck onto the plug when I pulled it out, so I couldn’t get a wrench on the plug. Huuuuge headache. PB Blaster and some very skinny tools did the trick.

1691100850947.jpeg

15 min job turned into a 5 day ordeal real quick.
 
Funny y’all are talking about coils. I went to change plugs last week and the rubber insulator from a coil stuck onto the plug when I pulled it out, so I couldn’t get a wrench on the plug. Huuuuge headache. PB Blaster and some very skinny tools did the trick.

View attachment 220212

15 min job turned into a 5 day ordeal real quick.

the pro tip for that is to just jam a screwdriver in the top of the damaged boot and snap the insulator off, hit the hole with some compressed air to clear any shards, then remove remains of spark plug normally, magnet on a stick or long needle noses help significantly
 
the pro tip for that is to just jam a screwdriver in the top of the damaged boot and snap the insulator off, hit the hole with some compressed air to clear any shards, then remove remains of spark plug normally, magnet on a stick or long needle noses help significantly
I mean, plug just took a couple hours of poking at the left over insulator until it fell apart. I wasn’t planning on changing the coil packs though. Had to wait on those which meant no car for a few days.
 
I mean, plug just took a couple hours of poking at the left over insulator until it fell apart. I wasn’t planning on changing the coil packs though. Had to wait on those which meant no car for a few days.


Yea thats what breaking the porcelain avoids
 
As someone who has owned one of those I can tell you cylinders 1-6 are running lean and the spark plugs on 3 & 4 are in the process of fouling from running rich. :)
I miss my old F150 and the ability to work on the motor so easily. And I never had problems with the old I-beam suspension.
 
Nephew's corvair.

Belt jumped off, took out the distributor cap.
He tried duct tape without any luck.

IMG_5101.jpeg

He diagnosed it as the idler pulley, which was not spring loaded. I doubt it, but he wanted to install the aftermarket, spring loaded version.

Maybe the weirdest mod I've made. The body panel is so thick, it is used to anchor a spring.
Of course this new assembly needs to be maintained..

IMG_5100.jpeg

I should draw some arrows. The engine is an air cooled flat 6. The belt is routed from vertical to horizontal.

There must be an electric fan option now...
 
Last edited:
Back
Top Bottom