The DIY thread - DIYourself

Im no expert, but for the extra $30 I like the peace of mind that it's "like for like" instead of finding out on a sunday at 5pm when its been 95F all day that its not.
I typically would agree, though I think this is like buying brake pads from the dealer vs Napa.

The HVAC guy had one in his van when he replaced it (apparently 4 years ago already) and I doubt it was the York branded one. I should just go take a peek at what is in there now.
 
Okay gang-non-functional attic fan.
HVAC dude diagnosed it as the motor- had power both before and after the switch.
I agreed with that logic.

Replaced the motor and the switch.
Still same thing- has power before and after the switch,
motor does not motor.

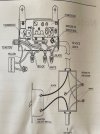
Wiring diagram
IMG_4639.jpg

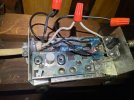
How he wired it- line in on the left, line out on the right.
IMG_4645.jpg
Note the line in goes to T-stat switch first (white knob), and line out comes from humidistat switch (black knob),
opposite what is shown the diagram.
I tried swapping them so line in goes to humidistat switch, line out comes from-stat switch.

Same result- power before and after switch, motor don't motor.
@Patrick said neutral must be open,
but that connection seemed solid and I can't imagine how it would be broken on the line in.

Note that there is no capacitor or master switch in my configuration like there is in the diagram.
I'm guessing no master switch isn't an issue, but what about there being no capacitor?

What are your thoughts ?
@Mtbdog
@Patrick
@Santapez

I've already bothered Patrick direct and I know Santa isn't an electrician, but what the hell
 
have you tried taking the temp/humidistat out of the equation to see if you can power it with just the on/off switch in the equation?
 
have you tried taking the temp/humidistat out of the equation to see if you can power it with just the on/off switch in the equation?
There’s no regular switch in the equation, I wanted to hook the line in directly to the fan leads, but Patrick said that would end with fire and new house.

Is there power to the motor if you test to ground?
I don’t know what this means.
 
There’s no regular switch in the equation, I wanted to hook the line in directly to the fan leads, but Patrick said that would end with fire and new house.


I don’t know what this means.

its labeled master on/off switch in your diagram, basically im asking you to take the temperature/humidstat unit out of the system and use that master switch to test the motor.

you could also open the motor plate and measure for voltage at that point to confirm circuit is complete.
 
Okay gang-non-functional attic fan.
HVAC dude diagnosed it as the motor- had power both before and after the switch.
I agreed with that logic.

Replaced the motor and the switch.
Still same thing- has power before and after the switch,
motor does not motor.

Wiring diagram
View attachment 263901

How he wired it- line in on the left, line out on the right.
View attachment 263900
Note the line in goes to T-stat switch first (white knob), and line out comes from humidistat switch (black knob),
opposite what is shown the diagram.
I tried swapping them so line in goes to humidistat switch, line out comes from-stat switch.

Same result- power before and after switch, motor don't motor.
@Patrick said neutral must be open,
but that connection seemed solid and I can't imagine how it would be broken on the line in.

Note that there is no capacitor or master switch in my configuration like there is in the diagram.
I'm guessing no master switch isn't an issue, but what about there being no capacitor?

What are your thoughts ?
@Mtbdog
@Patrick
@Santapez

I've already bothered Patrick direct and I know Santa isn't an electrician, but what the hell
I think you need the capacitor unless if there is one built into the motor. You should have a master switch on the system.
 
You're making me think I don't want to start fixing mine. I was away for a week and left it off. I originally thought it was the thermostat or humidistat. Then I thought it was the motor. Came back from vacation and turned the humidistat down to zero and it popped on again. Still waiting for a new one to be delivered. Then mine probably won't work too.
 
I think you need the capacitor unless if there is one built into the motor. You should have a master switch on the system.
Thank you, I thought that might be the case.

Now here’s the rub- the motor does not have a lead for a capacitor, only hot and neutral. Shaded pole motor?
If the switch is replaced with one not requiring a capacitor, does that solve it?

And the purpose of the master switch is for service, correct?

Also not sure if it really matters, but switch manual says to only use with same brand of motors (Dayton)
 
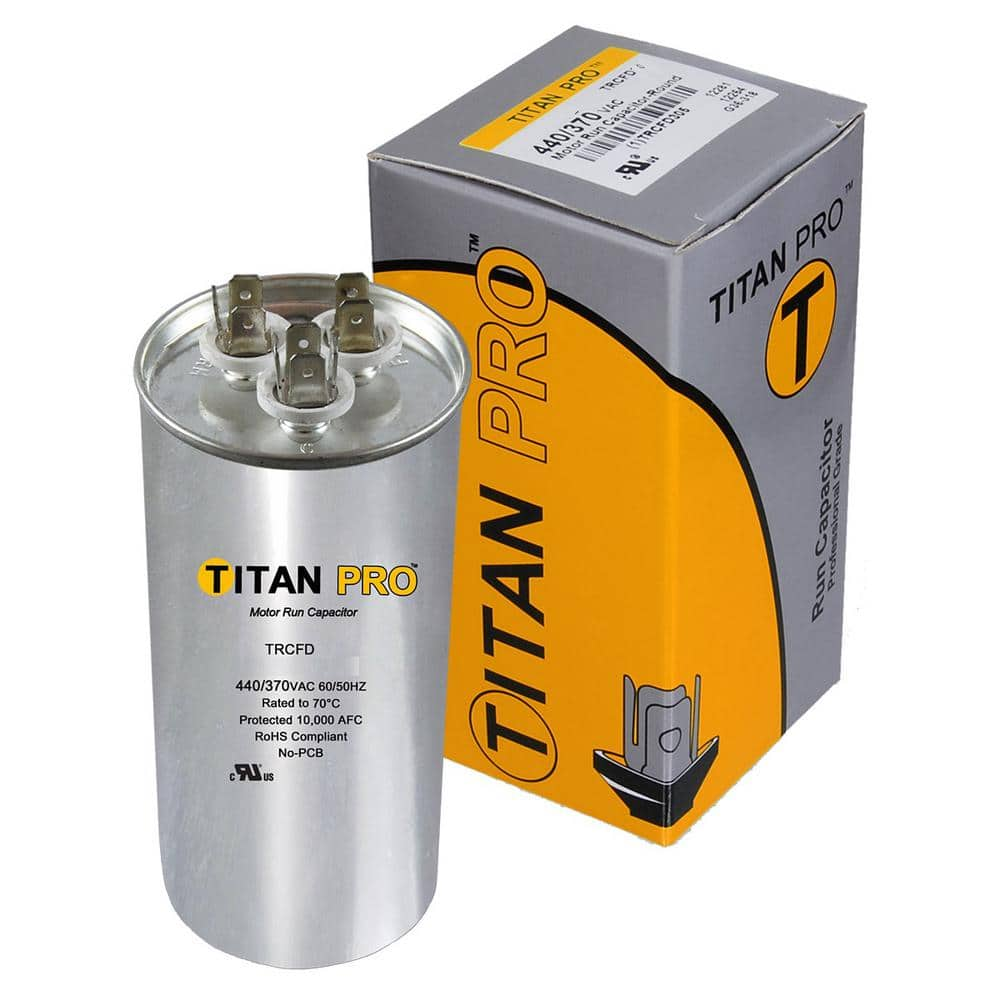
Back on capacitors, I want to order a backup. The york replacement is $50

Is there any reason this $20 Home Depot option wont do?

York:
View attachment 263865

Home Depot
View attachment 263866
I was close, this is what the AC guy installed a few years back. Need to ID that second capacitor, I’m guessing that may be for the compressor itself.
IMG_3780.jpeg
 
Thank you, I thought that might be the case.

Now here’s the rub- the motor does not have a lead for a capacitor, only hot and neutral. Shaded pole motor?
If the switch is replaced with one not requiring a capacitor, does that solve it?

And the purpose of the master switch is for service, correct?

Also not sure if it really matters, but switch manual says to only use with same brand of motors (Dayton)
Yes the master switch is for service.
You will need to check the motor to see if it is shaded pole or not, certainly seems to be pointing in that direction.
 
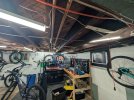
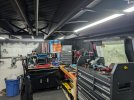
Bordering in diWhy, but I sprayed my joists yesterday.

View attachment 263909

View attachment 263910

Now to paint the walls and figure out what I'm doing with the floor. Early favorite is a Chinese swisstrax knock off.
When we moved in here in 2003 I knew that was the only time the basement was ever gonna be empty.

I did the cinder block walls with dry lock and the floor with the Rustoleum epoxy kit with the paint chips. It’s still 100% perfect except the spot my desk chair wheels wore out a few small spots during COVID before I got a vinyl chair mat.

I also think it’s still good because of all the prep I did including etching with muriatic acid. Just be careful with that stuff if you use it.
 
When we moved in here in 2003 I knew that was the only time the basement was ever gonna be empty.

lol yep. Unfortunately the entire house was in need of at least wall paint so basement wasn't even on my radar.

I did the cinder block walls with dry lock and the floor with the Rustoleum epoxy kit with the paint chips. It’s still 100% perfect except the spot my desk chair wheels wore out a few small spots during COVID before I got a vinyl chair mat.

I also think it’s still good because of all the prep I did including etching with muriatic acid. Just be careful with that stuff if you use it.

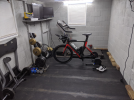
We painted our garage (now home gym) pretty early after we moved in (I don't have a before unfortunately, but it was horrifying) with Behr Dry Plus paint with just a light cleaning and it's been holding up pretty nicely for 5 years now. It's apparently slightly hydrophobic which is a nice benefit. This picture was the first iteration of the home gym...since got horse stall mats, power rack, dedicated trainer corner, treadmill etc. and ditched triathlon lol.

1751713043452.png

I'd love to do the whole basement including epoxy flooring but the thought of the prep work and moving all our crap somewhere for even a few days seems more trouble than what it's worth.
 
DIY: Pool equipotential bonding edition.

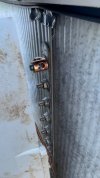
So after a lot of research and good advice from @Mtbdog I launched my project the other day.

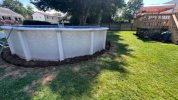
Phase 1: dig 4-6” trench that is 18” away from the pool wall.
I knew this was gonna suck but I probably should not have done this after my 55 mile very hilly ride.
Got the pick axe and shovels and chipped away for about 4 hours or so resulting in this.
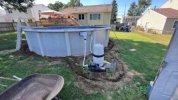
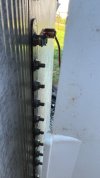
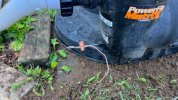
Phase 2: run bonding wire and connect to pool skimmer and pool wall.

after a trip to HD with the middle son who also has learned quite a bit about electrical work, we figured out what we needed to make all the connections work.

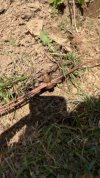
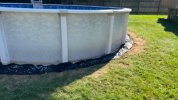
Laid and buried the wire all the way around. Made the branch of connections for the under skimmer water bonding kit and the pool wall.

First challenge was to figure out how to connect to the pool since all the components of this pool are resin so this negates the need to connect 4 places around the pool. Connecting to the pool wall joint was something I read online about but I was VERY nervous to take the coping and side post apart to get to the bolts. But I read just taking one piece and loosening it up was no problem. Thanks to google I was able to find the common size of the pool wall bolts so we got a bonding lug and the same size nut and it fit perfectly. I was able to move the copings off and gently bend back the resin post enough to get a wrench in there. Nearly looks like it came that way.

The skimmer kit sits inside the pump skimmer with an exposed metal wire sealed off by a compression fitting that replaces the drain plug. Connecting to the wire also easy peasy.

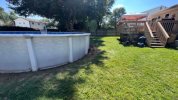
The worst part of all this was the digging and backfill. Tamped down the dirt and prepped for river rock Edging sometime tmw or Monday - I guess that’s phase 3.

I am definitely getting too old for this shit but I learned a lot and happy with how it came together knowing it’s done properly. Oh and not having someone possibly get electrocuted is a bonus.

A few pics for the timeline. Now time for bed I’m BEAT!!

IMG_8288.jpegIMG_8290.jpegIMG_8314.jpegIMG_8315.jpegIMG_8317.jpegIMG_8320.jpegIMG_8322.jpegIMG_8323.jpegIMG_8326.jpeg
IMG_8328.jpeg
 
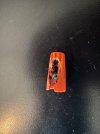
Finally got around to replacing the thermostat/humidistat for the attic fan. I'm guessing two out of the three wire nuts shouldn't look like this? Sadly, spent the majority of the time just trying to reconnect the ground wire to the new box as the previous person bent this every which way and it just didn't want to stay locked in place. But it's done and most importantly is that I got it finished while my Construction PM wife was out of the house.

IMG_5738.jpeg
 
Finally got around to replacing the thermostat/humidistat for the attic fan. I'm guessing two out of the three wire nuts shouldn't look like this? Sadly, spent the majority of the time just trying to reconnect the ground wire to the new box as the previous person bent this every which way and it just didn't want to stay locked in place. But it's done and most importantly is that I got it finished while my Construction PM wife was out of the house.

View attachment 264336

This happens when the conductors aren't twisted together before the nut is put on.
Sometimes the nut hits the insulator, and it feels like it is twisting the conductors, but it isn't.
Solid troubleshooting/diagnosis there!
 
Back
Top Bottom